The Land Cruiser Restoration Project
Resto Home Page
Page 1 2
3 4 5
6 7 8
9 10 11
12 13 14 15
16 17 18
19 20 21
22 23 24
25 26 27
28 29 30
31 32 33
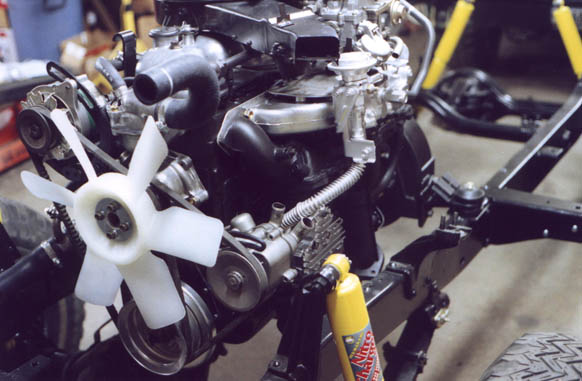
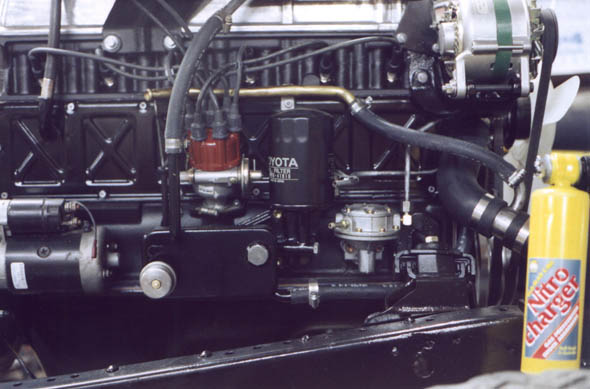
Over the course of the winter, the motor is fully dressed. Carb is installed, air cleaner, hoses, pretty much everything you can bolt on without also having the firewall there and all the stuff that goes on that. As you can see, there is a lot of new parts and everything else is totally rebuilt, refurbished and freshly painted. Looks like I would have imagined it looked when it rolled through the assembly line at the Araco plant a quarter century ago. More and more as this project goes on, I am using new OEM Toyota parts, from gaskets and seals to hoses, wires and belts. They are made to bolt in and last a very long time.


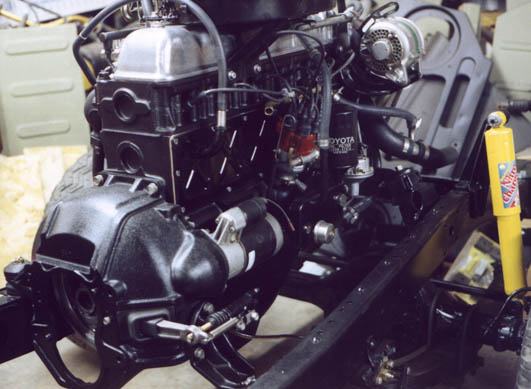
In the photo below, there is a nice view of the clutch and bellhousing, slave, throwout bearing and release fork. You can also see all the carb linkage and EGR stuff on the upper left side.
This is kind of a handy reference for what stuff looks like on the right side, all shiny and new. Note the vacuum advance non-USA distributor. I have been running one of there in my 71 for some years now and have been so happy with the power and performance that I got another one for this project. Even though it uses points, it has not even needed a cleaning, let alone readjustment or replacement in over 15,000 miles now, despite frequent inspections.
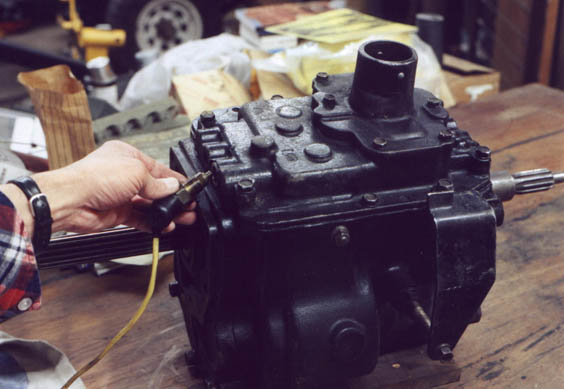
While rearranging things to get ready to work on the tranny, I noticed that there was a lot of gunk on the t-case so I thought I'd clean it up some before setting it aside. I love this parts sink, can't imagine how I ever lived without it before. Kinda like washing dishes...I can do that! I use regular old paint thinner from Walmart ("mineral spirits"), a buck or two a gallon, cleans very well, not too toxic and low flammability.

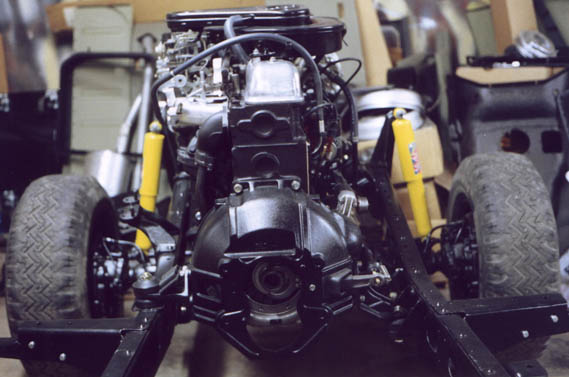
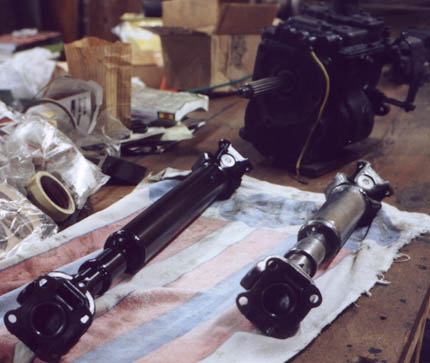
I checked out my driveshafts thoroughly. The original factory u-joints are in excellent condition, so I simply wirewheeled everything down to bare steel, cleaned, masked and repainted. There is a lot to be said for regular prescribed maintenance. I pump grease into all zerks from steering tie rod ends to u-joints every other oil change, which I do every 2500 miles.
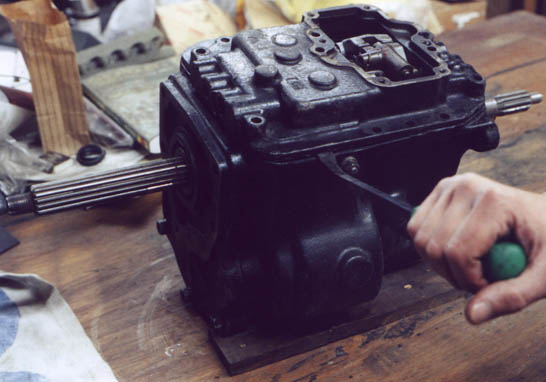
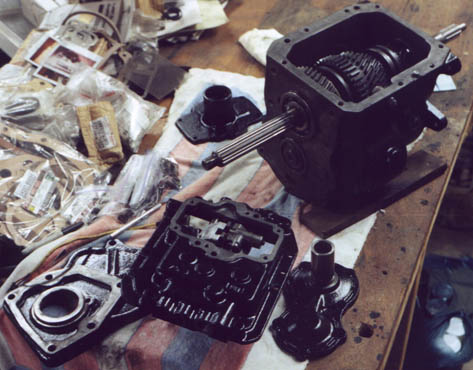
The next step was to disassemble the H41 4 speed tranny I got for this project and do a thorough inspection. On the outside it appeared in very good shape and it shifted easily. First the reverse switch is removed. One of the wires has broken off and both will have to be reattached soldered and covered with heatshrink before it goes back in there.
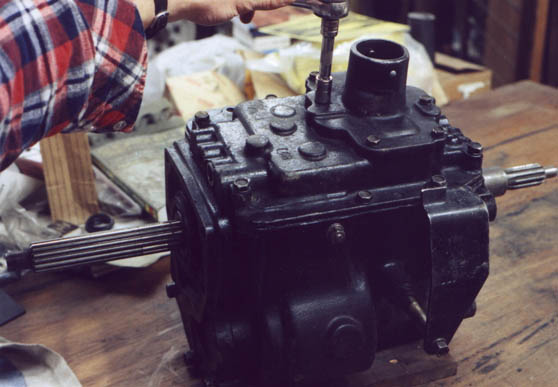
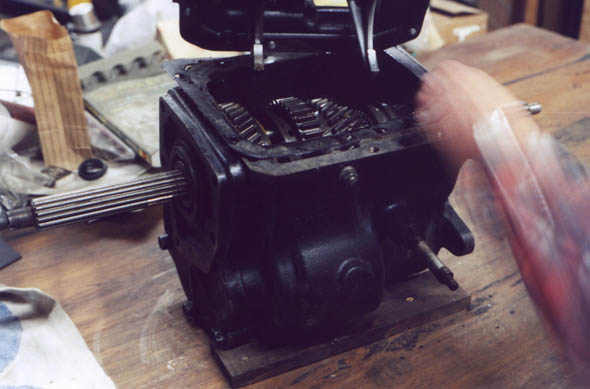
Next the shift tower plate comes off. Watch out for the three springs and balls that are for the fork shaft detents. I was glad that I put everything into carefully labeled ziplock bags as I went, it saved a lot of time when I reassembled it later. First the shifter tower is removed, then the top plate is removed. It required a little bit of persuasion with a small pry bar. Apparently the factory ancipated this removal method, as the are ears in the casting specifically for this. I was surprised at how easily the gaskets came off, no scraping required. When I reassembled it later, I smeared a very light coating of multipurpose grease on both sides of the new paper gaskets, hoping that this would make future removal as easy as these were.
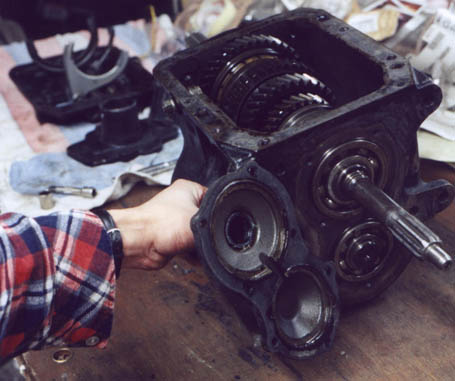
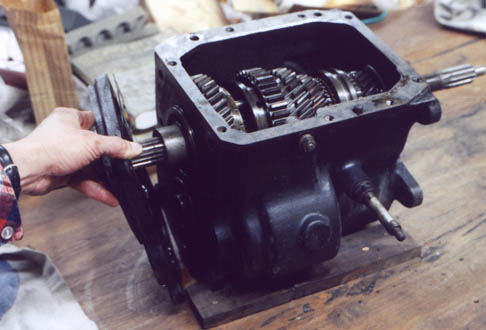
Lower right, you can see the input shaft seal. This seal is driven into the gland backwards from the way seals are normally driven in, that is the metal frame of the seal has the flat part facing the gland in the casting, with the sharp edge outward. This positions the lip pointing toward the oil to hold it in. Removing and replacing the seal proved easier than it looked like it might be.


Page 1 2
3 4 5
6 7 8
9 10 11
12 13 14 15
16 17 18
19 20 21
22 23 24
25 26 27
28 29 30
31 32 33
home what's new cruiser links trail reports cruiser sightings land cruiser tribute tech tips photos maps band links misc links profile email