Page 1 2 3 4 5 6 7 8 9 10 11 12 13 14 15 16 17 18 19 20 21 22 23 24 25 26 27 28 29 30 31 32 33
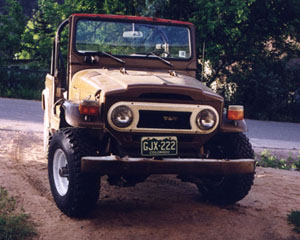
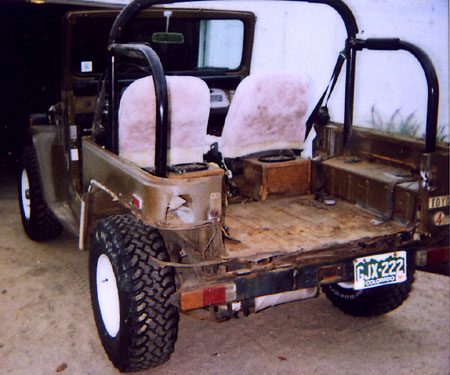
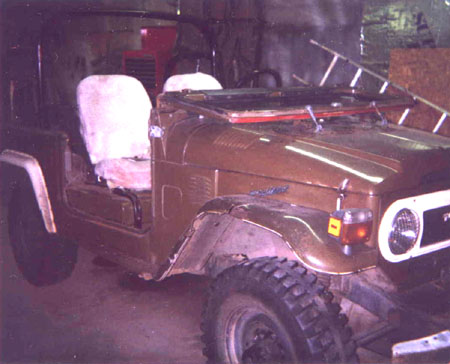
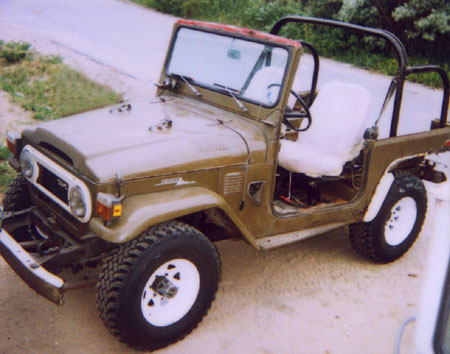
 This is what I had to start with.
 During the second half of the winter, plans were made for the project,
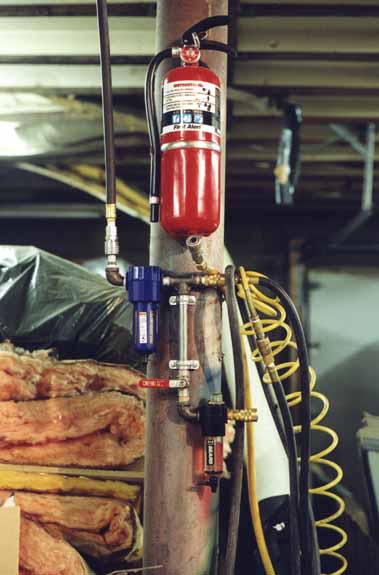
and parts were sourced and brought in. Tools were acquired, such as air
compressor, sand blaster, air tools, etc., which would be needed for the
project. A compressed air distribution system had to be designed and installed,
with filter/water trap for all applications, then a separate bypassable
lubricator for the air tools. Now that spring 1999 is here (OK as I write this
it is officially the first day of summer), the deconstruction has proceeded
apace. Besides the body, there were a few other mechanical items that would
become part of the project, such as a new brake booster and smog pump,
so these were done first.
During the second half of the winter, plans were made for the project,
and parts were sourced and brought in. Tools were acquired, such as air
compressor, sand blaster, air tools, etc., which would be needed for the
project. A compressed air distribution system had to be designed and installed,
with filter/water trap for all applications, then a separate bypassable
lubricator for the air tools. Now that spring 1999 is here (OK as I write this
it is officially the first day of summer), the deconstruction has proceeded
apace. Besides the body, there were a few other mechanical items that would
become part of the project, such as a new brake booster and smog pump,
so these were done first.
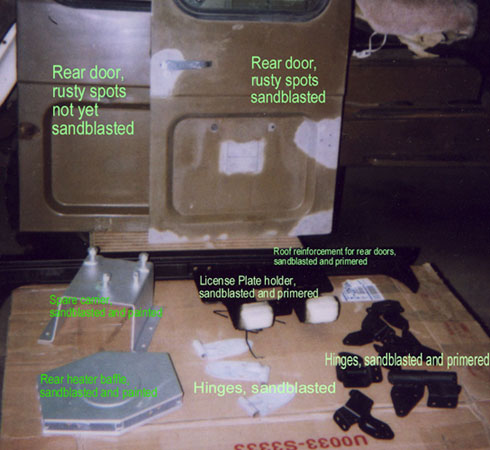 First, non-critical items were worked on. For example,
the spare tire holder has not been attached for years, so it was disassembled,
and each of the parts were individually sandblasted, smoothed down with
steel wool and then primered.
First, non-critical items were worked on. For example,
the spare tire holder has not been attached for years, so it was disassembled,
and each of the parts were individually sandblasted, smoothed down with
steel wool and then primered.
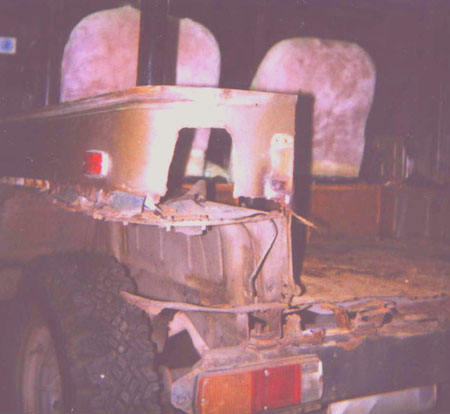
 This is what it looked like when I started, you can see where the quarter
panel used to be. The spare tire holder used to mount to where there is
no metal left, all rusted away! The muffler is history too; a new stock
exhaust pipe, muffler, tail pipe and hangers has already been brought in,
got a good deal at Man-A-Fre.
I figure that it will be easier to get to once the body is off.
This is what it looked like when I started, you can see where the quarter
panel used to be. The spare tire holder used to mount to where there is
no metal left, all rusted away! The muffler is history too; a new stock
exhaust pipe, muffler, tail pipe and hangers has already been brought in,
got a good deal at Man-A-Fre.
I figure that it will be easier to get to once the body is off.
 Next, the rear heater came out. To enable it to be driven in the mean
time, a bypass was fabricated from 1/2" copper sweat and installed across
the inlet and outlet. The heater baffles were sandblasted and repainted,
and I've given up looking for a new core. I have made dozens of inquiries,
and so far haven't even been able to find a place that will build a new
one custom. I ended up buying a used one from a local cruiser guy, Mark Sobczak.
Next, the rear heater came out. To enable it to be driven in the mean
time, a bypass was fabricated from 1/2" copper sweat and installed across
the inlet and outlet. The heater baffles were sandblasted and repainted,
and I've given up looking for a new core. I have made dozens of inquiries,
and so far haven't even been able to find a place that will build a new
one custom. I ended up buying a used one from a local cruiser guy, Mark Sobczak.
The next step was to remove the rear doors. There is no metal left where the strike for the latch used to be, so they have been held shut with bungee cords for the last several years.
 Taking the hinges off proved to be a bit of a pain, as the fasteners are
phillips head and were quite rusted. Most of them were coaxed out with
an impact driver, but a few had to be torched off. Since most of them will
have to be replaced anyway, I am thinking of using stainless steel socket
head replacements. You can see the propane torch sitting on the rear bed
there. It really doesn't put out enough heat for a lot of this stuff. I
have tried MAPP gas, and it does work better, but I think an oxy-acetylene
rig will be needed.
Taking the hinges off proved to be a bit of a pain, as the fasteners are
phillips head and were quite rusted. Most of them were coaxed out with
an impact driver, but a few had to be torched off. Since most of them will
have to be replaced anyway, I am thinking of using stainless steel socket
head replacements. You can see the propane torch sitting on the rear bed
there. It really doesn't put out enough heat for a lot of this stuff. I
have tried MAPP gas, and it does work better, but I think an oxy-acetylene
rig will be needed.
 After the rear doors, we then took the roof off. There was one bolt to
the windshield frame that just spun, I think it may have originally had
a nut welded to the inside of the windshield frame tube that came un-welded.
So I heated it cherry red with the torch with MAPP gas, the quenched it
with a super soaker. That weakened it sufficiently that it could be cut
off with a cold chisel. Once the roof was off, the hard top sides were
removed. This photo shows me removing the last bolt holding those on.
After the rear doors, we then took the roof off. There was one bolt to
the windshield frame that just spun, I think it may have originally had
a nut welded to the inside of the windshield frame tube that came un-welded.
So I heated it cherry red with the torch with MAPP gas, the quenched it
with a super soaker. That weakened it sufficiently that it could be cut
off with a cold chisel. Once the roof was off, the hard top sides were
removed. This photo shows me removing the last bolt holding those on.
 With the sides off, you can get a better idea of how badly rusted the poor
thing is. The new quarter panels from Cool
Cruisers of Texas require that the top channel from the old quarter
panels be cut off and welded onto the new ones, so I get to learn how to
MIG weld later on in this project.
With the sides off, you can get a better idea of how badly rusted the poor
thing is. The new quarter panels from Cool
Cruisers of Texas require that the top channel from the old quarter
panels be cut off and welded onto the new ones, so I get to learn how to
MIG weld later on in this project.
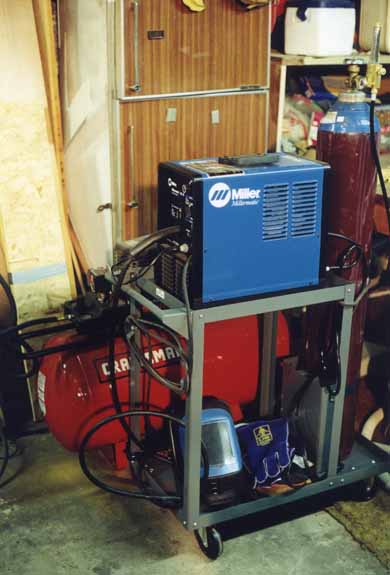 (later in the project) Here's a shot of the Miller welder I got. It came in handy when I had to weld up that crack in the exhaust manifold of the '71! Soon it will be getting duty on sheet metal too. I also used it to weld up the broken chair from the dining room, and weld up a 1" crack in the driver's side fender. Still need more practice!!!
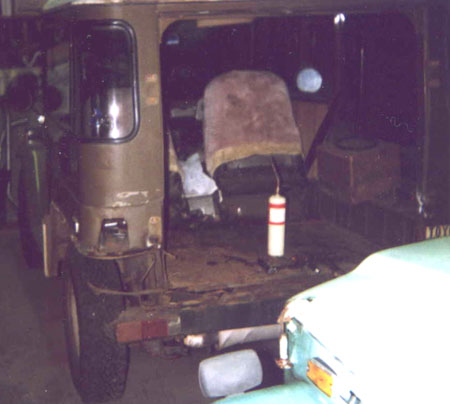
 From this angle, you can also see how the right front fender is shedding
bond-o from an apparent repaired boo boo from before I bought it. Oddley,
this cruiser never came with a complete set of rear jump seats, just the
back of the passenger side one. So I will need to get hold of a used set
from somewhere. (Update, bought a pair from a lister, thank you Josh!) Like rear heater cores, these seem to be in short supply
in the aftermarket. I removed both door hinges from the passenger side
door, but the upper one on the driver's side is nested amongst the fusebox
and main wiring harness, so that will have to wait until later.
From this angle, you can also see how the right front fender is shedding
bond-o from an apparent repaired boo boo from before I bought it. Oddley,
this cruiser never came with a complete set of rear jump seats, just the
back of the passenger side one. So I will need to get hold of a used set
from somewhere. (Update, bought a pair from a lister, thank you Josh!) Like rear heater cores, these seem to be in short supply
in the aftermarket. I removed both door hinges from the passenger side
door, but the upper one on the driver's side is nested amongst the fusebox
and main wiring harness, so that will have to wait until later.
This past (Father's Day) weekend was spent sandblasting and primering the rear door hinges and the air cleaner covers, removing what was left of that jumpseat, and trying to get the broken off rear bumpette bolts out. It turns out that if you break off an EZ-Out stud remover in a bolt, you can't drill the stud remover out. I even went and got some cobalt drill bits, but they didn't work either. I may be able to get at the two remaining bolts with the broken stud removers in them from the back side once the rest of the tub is off. Sigh.
 Update...22 July 1999. Getting a bit behind schedule, thanks to losing
two weekends to the holiday and some other commitments, still making progress
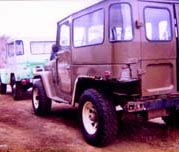
though. Since I swapped wheels and tires with the '71, and
the stock wheels that were on the '71 would not clear the disk brake calipers,
I had to get the new wheels and tires sooner than expected. While still
working on individual parts, the beast is still driveable, and those new 31x10.5 BFG M/Ts on 15x8 white spokers are
really nice. On the advice of my buddy at the tire store, I had them siped
for better traction and longer wear.
Update...22 July 1999. Getting a bit behind schedule, thanks to losing
two weekends to the holiday and some other commitments, still making progress
though. Since I swapped wheels and tires with the '71, and
the stock wheels that were on the '71 would not clear the disk brake calipers,
I had to get the new wheels and tires sooner than expected. While still
working on individual parts, the beast is still driveable, and those new 31x10.5 BFG M/Ts on 15x8 white spokers are
really nice. On the advice of my buddy at the tire store, I had them siped
for better traction and longer wear.
Page 1 2 3 4 5 6 7 8 9 10 11 12 13 14 15 16 17 18 19 20 21 22 23 24 25 26 27 28 29 30 31 32 33